
There are different ways to install Wikibase. The most common are:
When you install Wikibase and your Wikibase Installation is public, please register your installation in the Wikibase Registry
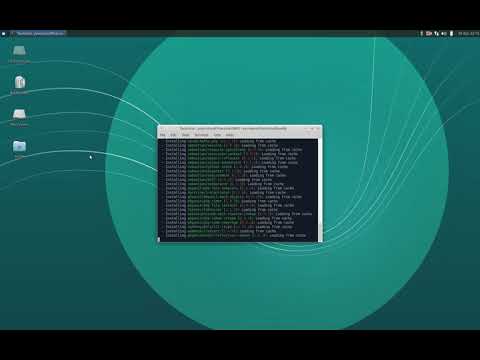
Install Wikibase using Git and Composer
This screencast shows how to install Wikibase using Git and Composer:
Prerequisites to install a Wikibase instance:
- A web server with PHP and a database server. The detailed requirements are listed on mediawiki.org.
- Git version control system
- Composer dependency manager
Get MediaWiki and extension files
- Run
git clone https://gerrit.wikimedia.org/r/mediawiki/core.git --branch REL1_32 mediawikiin your console or command line. This will clone the MediaWiki version 1.32 into a subdirectory “?mediawiki” of your current directory. (Be sure to checkout the current MediaWiki version before running the command and replaceREL1_32with the most current MediaWiki version.) - Enter the subdirectory (
cd mediawiki) and runcomposer install --no-dev, which installs all dependencies required by MediaWiki. MediaWiki extension may be installed usingcomposer install <package>:<version>as done in the following. Extensions are listed on mediawiki.org and packages of the extensions are also distributed through the Composer packages repository packagist.org for being able to easily install them using Composer. -
To install the Vector skin, which is the default of Wikipedia, run
composer install mediawiki/vector-skin:dev-REL1_32. This will download the Vector skin files and all dependencies.The specified version (
dev-REL1_32) must match the version of MediaWiki (with all MediaWiki extensions featuring adev-prefix). Otherwise, compatibility issues may occur. - To install the Universal Language Selector that allows specifying labels and descriptions in a vast range of languages, run
composer install mediawiki/universal-language-selector:dev-REL1_32. - To install Wikibase, run
composer install wikibase/wikibase:dev-REL1_32.
Set up MediaWiki and extension
Now it’s time to set up MediaWiki using the web interface.
- In your browser, navigate to the path MediaWiki was installed into as served by the web server, e.g.:
http://localhost/mediawiki. You are prompted with a hint that let’s you start the setup process. One of the more relevant parts of the setup is to specify the database MediaWiki should install it’s database tables to. - After completing the setup, you are prompted to download the file
LocalSettings.phpand copy that into the installation directory of MediaWiki. Having done so, openLocalSettings.phpwith a text editor, because the extensions installed above still need to be activated. - While the Vector skin is activated automatically, the Universal Language Selector needs to be activated manually by adding the line
wfLoadExtension( 'UniversalLanguageSelector' );at the bottom ofLocalSettings.php. -
To activate the Wikibase Repo, add the following lines at the bottom of
LocalSettings.php:$wgEnableWikibaseRepo = true; $wgEnableWikibaseClient = false; require_once "$IP/extensions/Wikibase/repo/Wikibase.php"; require_once "$IP/extensions/Wikibase/repo/ExampleSettings.php";For setting up a Wikibase Client or a Repo/Client, see instructions on mediawiki.org.
- Wikibase requires its own tables in the database to store its information. In order to create these tables required by Wikibase switch back to your console or command line and run
php maintenance/update.phpin your MediaWiki installation directory.
Verify Wikibase installation
Wikibase ist now installed, set up, and ready to use. For verifying your installation, access you Wiki in the browser and click Special pages in the Tools section of the menu. At the bottom of the page is a section titled Wikibase. Clicking Create a new item let’s you create you first Wikibase item.
Install Wikibase with Docker
This Video will show installing the Wikibase Docker image:
All information about the Docker installation can be found in the Wikibase Docker image repository.
Installing a stand-alone Wikibase instance and SPARQL Query Service with Docker
The Wikibase Docker image repository contains an example docker compose file that can be used with the images also contained in this repo. Following these instructions, you’ll be able to install a stand-alone instance of Wikibase, as well as fully functional SPARQL endpoint and query service, complete with a data visualisation frontend and query helper (similar to the Wikidata Query Service).
Individual documentation for each image used in this example can be found in the Wikibase Docker image repository Readme file.
WARNING: Currently this example requires 3GB+ of memory. If you are running Docker for Windows or Mac and have containers run within a VM (the default) make sure you set your VM memory allocation to 4GB. If you don’t do this, the query service may fail to run.
Installing Docker and the Wikibase images
You’ll need to install Docker, Docker Compose and clone images from this repository. For a single script to run that should work on a Wikimedia Toolforge (wmflabs) VM running Debian Jessie with 4GB memory, take a look at setup.sh in this repository.
1) Install Docker (community edition) & Docker compose
Note: Docker Compose is included in the Docker community edition, so most likely you won’t need to install it separately.
2) Copy the docker-compose.yml file
This file is only meant as an example, your modification might be needed.
wget https://raw.githubusercontent.com/wmde/wikibase-docker/master/docker-compose.yml
If you want to develop the Dockerfiles then you should clone this repo and instead use the docker-compose-build.yml file.
3) Setting up and starting the containers
Note: In linux you must either be in the docker group or use sudo!
Pulling / updating the images
docker-compose pull
Starting the containers
docker-compose up
Quickstatements
To set up quickstatements follow the instructions in the quickstatements README
Stopping the containers
docker-compose stop
Removing the containers
docker-compose down
This will keep all data stored by MySQL, Mediawiki and the Query Service in Docker volumes.
Removing both the containers and data
WARNING: this will remove ALL of the data you had added to Wikibase and the Query Service.
docker-compose down --volumes
Backing up data from Docker volumes
All data for Wikibase and the Query Service is stored in Docker volumes. You can create compressed copies of these volumes to use as backups or to hand off to other users.
Volume backups will only work if you use the same image when restoring / using the backup data. If you are backing up your mysql data you may also want to just take an SQL dump.
You can see all Docker volumes created by using the following command:
docker volume ls | grep wikibase-docker
You can grab a zip of each volumes by doing the following:
docker run -v wikibase-docker_mediawiki-mysql-data:/volume -v /tmp/wikibase-data:/backup --rm loomchild/volume-backup backup mediawiki-mysql-data
You, or someone else, can then restore the volume by doing the following:
docker run -v wikibase-docker_mediawiki-mysql-data:/volume -v /tmp/wikibase-data:/backup --rm loomchild/volume-backup restore mediawiki-mysql-data
Backing up data using mysqldump
If using volume-backup for the database does not work because of InnoDB tables
(check here),
you can achieve data backup using mysqldump.
Backing up with mysqldump
docker exec wikibase-docker_mysql_1 mysqldump -u wikiuser -psqlpass my_wiki > backup.sql
Restoring from mysqldump backup file
docker exec wikibase-docker_mysql_1 mysql -u wikiuser -psqlpass my_wiki < backup.sql
Accessing your Wikibase instance and the Query Service UI
Access the following hosts:
- Wikibase @ http://localhost:8181
- Query Service UI @ http://localhost:8282
- Query Service Backend (Behind a proxy) @ http://localhost:8989/bigdata/
- Query Service Backend (Direct) @ http://localhost:8999/bigdata/
- Quickstatements @ http://localhost:9191
Creating content and querying it
You can start creating items and properties to start populating your Wikibase instance via these special pages
Once you’ve created your first items and statements, you’ll be able to query them and visualize the results through the Query Service UI.
Exporting data as a JSON or RDF dump
Get a JSON dump from wikibase:
docker-compose exec wikibase php ./extensions/Wikibase/repo/maintenance/dumpJson.php
Get an RDF dump from Wikibase:
docker-compose exec wikibase php ./extensions/Wikibase/repo/maintenance/dumpRdf.php
Troubleshooting
- I am on linux and I don’t want to run docker as root!
- The query service is not running or seems to get killed by the OS?
- The docker-compose setup requires more than 2GB of available RAM to start. While being developed the dev machine has 4GB of RAM.
Using Open Stack to run a custom Wikibase instance
This Video will show you, how to do run a custom Wikibase with OpenStack.
…Video…
To get all information please read Using Open Stack to run custom Wikibase.
Getting Started
- Create an account, if you don’t have one already
- Add billing details
- Click the button to setup horizon
- Navigate to “Project”
Compute Instances Launch Instance
- Name: wikibase1, Any availability zone, count 1
- Source, latest ubuntu (currently 18.04)
- Flavour: c1.large (medium should also work)
- Key pair, create one and download the PEM :)
Launch Instance
Add a public IP
- From the instances page, click on the actions menu on the right hand side and click “Associate floating IP”
- Click the “+” button to add a new IP
- Click “Allocate IP && Associate”
Add firewall rules
- Navigate to Project » Compute » Access & Security » Security Groups
- Click on “Manage Rules” for the default group
- Allow Ingress on port 22 (for ssh) for your IP (or all IPs, depending on how secure you want to be)
- Allow Ingress on the ports for Wikibase and Query Service UI access (defaults are at 8181 and 8282) from all IPs 0.0.0.0/0.
Login to the instance
ssh ubuntu@111.111.111.111 # where the IP is the public IP you assigned
Install deps
sudo apt-get update
- Install Docker, follow the instructions on https://docs.docker.com/install/linux/docker-ce/ubuntu/
- Install Docker Compose, follow the instructions on https://docs.docker.com/compose/install
Get your Docker Compose
In the future there will be a lovely UI that you can download a docker-compose.yml. Currently you have to look at the example and work from that replacing various default values.
- All values that should be replaced are included next to “CONFIG” comments in the yaml
- wget https://raw.githubusercontent.com/wmde/wikibase-docker/master/docker-compose.yml # Make your modifications, or just download your modified file
sudo docker-compose up -d #Wait for a few seconds
sudo docker-compose ps #check the status
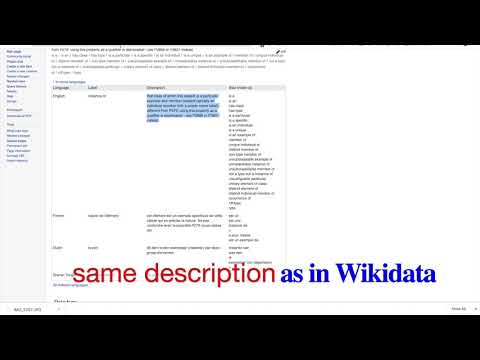
Finally, there will be an empty Wikibase ready for use. When the Wikibase Cloud screen is visible, it is ready to receive input. If the instance runs on the same infrastructure as Wikidata, linked data can be added using the same data model allowing for better integration between Wikidata and the freshly installed Wikibase instance. We are now able to populate this Wikibase instance running on the Fuga Cloud server by using the same Python framework used to add data to Wikidata.